Monday
January 26, 2026

Ready to build a strong, wide back without lifting a single weight? Let’s dive into one of the most underrated yet powerful bodyweight exercises out there — the Inverted Row. Whether you’re a calisthenics beast or a beginner trying to escape noodle-arm status, this move is pure gold. We’ll break down how to do inverted rows correctly, the muscles they work, common mistakes, pro tips, and how to progress like a boss. Get ready to transform your back, your posture, and your gains — all with just your body weight. Let’s go!
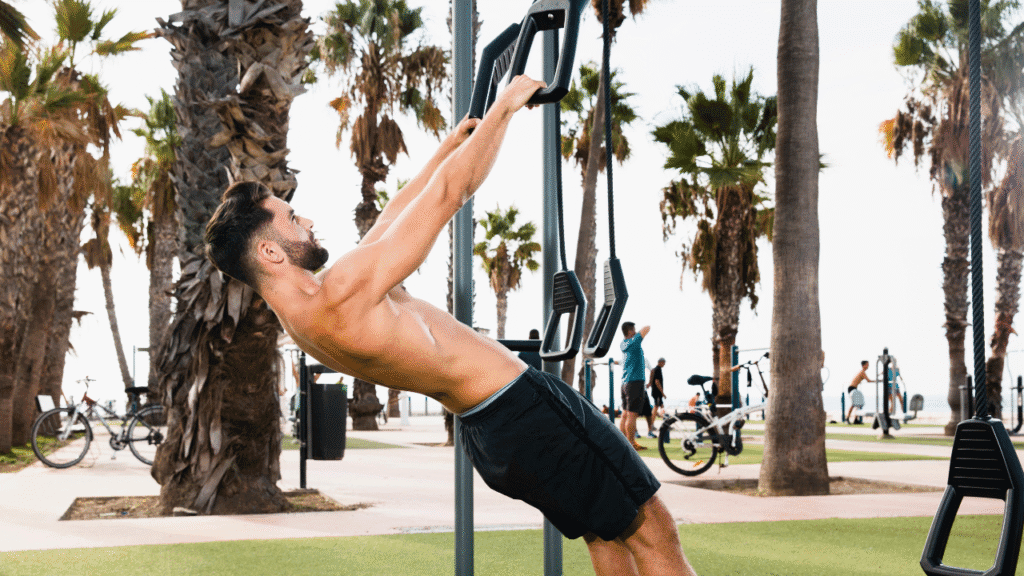
Inverted rows, also known as body rows or horizontal pull-ups, are a bodyweight pulling movement where your body acts like a lever. You grip a bar (or rings), keep your body straight, and pull your chest to the bar. Think of them as the reverse of a push-up. Instead of pushing away from the ground, you’re pulling toward a bar.
This exercise primarily targets the upper back, lats, rhomboids, and rear delts. Your biceps and forearms jump in as supporting players, and your core works hard to keep your body rigid. It’s a foundational movement that builds strength, muscle control, and posture. Plus, it’s a safer and easier gateway to pull-ups.
Why should you care about inverted rows? First off — they’re accessible. No gym membership? No problem. A sturdy table, bar, or even playground rail works fine.
Secondly, they’re amazing for posture. If you’re hunched over a screen all day, this movement pulls your shoulders back and engages the neglected muscles in your upper and mid-back. It also improves scapular retraction and shoulder stability.
And the cherry on top? You build real, functional strength. Not just in your back, but in your grip and core, too.
Let’s zoom into the anatomy. Inverted rows light up:
Latissimus Dorsi (Lats): The wide, V-taper muscles on your back
Rhomboids: Between your shoulder blades
Trapezius: Upper and mid traps stabilize the shoulder girdle
Posterior Deltoids: Rear shoulders for that rounded 3D look
Biceps & Brachialis: Arm power for pulling
Core: To keep your body straight and rigid throughout the movement
In short, inverted rows train your entire posterior chain from the waist up.
Here’s how to get started:
Use a Smith machine, suspension trainer, low pull-up bar, or a sturdy table.
Set the bar at waist height if you’re new. The lower the bar, the harder the move.
Lie underneath it and grab the bar with an overhand grip, slightly wider than shoulder-width.
Keep your heels on the ground and your body straight like a plank.
No fancy gym gear needed. Just some creativity and grit.
Grip the bar: Hands overhand, just wider than shoulders.
Engage your core: Squeeze your glutes, abs tight, spine neutral.
Initiate the pull: Drive your elbows back, pull your chest toward the bar.
Pause at the top: Bar hits mid-chest. Squeeze your shoulder blades.
Lower slowly: Control the descent for max muscle engagement.
Quality over quantity. Keep it smooth, steady, and controlled.
Even simple moves have traps. Avoid these:
Sagging hips: This kills core engagement. Stay plank-tight.
Flaring elbows: Tuck them slightly to protect shoulders.
Not pulling high enough: Aim for the chest, not the stomach.
Speed repping: Momentum isn’t strength. Slow it down.
Short range of motion: Go full range — all the way up, all the way down.
Fix these, and your gains will skyrocket.
Whether you’re a newbie or advanced, there’s an inverted row for you:
Beginner: Knees bent, bar at chest height
Intermediate: Legs straight, lower bar
Advanced: Elevate feet, add tempo or weight vest
Pro Mode: Use gymnastic rings or TRX for instability
Progress at your pace. Each variation hits the back with intensity.
How often and how many?
Beginner: 3 sets of 8-10 reps, 2-3x a week
Intermediate: 4 sets of 10-12 reps
Advanced: 5 sets of 12-15 with added resistance
Pair inverted rows with push-ups for a balanced push-pull routine. Add them to your upper-body days or full-body splits.
Consistency > intensity. Show up, rep out, grow.
Warming up pre-row is key to keeping joints safe and muscles activated.
Arm circles: 30 seconds forward/backward
Scapular push-ups: Activate scapular control
Band pull-aparts: Warm up traps and rear delts
Dead hangs or shoulder dislocations (with bands): Open up shoulders
Spend 5-10 minutes getting loose and ready before your first rep.
Let’s compare these back-building beasts:
Inverted Rows: Easier, horizontal pull, better for beginners, and posture correction.
Pull-Ups: Vertical pull, harder, requires more upper body strength.
Use inverted rows to build the strength foundation for pull-ups. In fact, if you can’t do a pull-up yet, inverted rows are your golden ticket to get there.
Inverted rows are simple, scalable, and insanely effective for building a strong, muscular back. Perfect for beginners, fantastic for bodyweight warriors, and essential for anyone serious about functional strength. Add them to your routine, master the form, and keep leveling up.
Men’s trending fashion and how to look attractive. Here teaching fashion, so make sure to check it out.
Men’s Fitness tips, what you eat and how to stay fit your body. The best workout and best diet plan, so make sure to check it out.
Men’s lifestyle tips, how to live a better life, and changing your lifestyle tips, so make sure to check them out.
It cannot be denied that men have finally come to their senses when it comes to good grooming and fashion statement.
Men are also equally frustrated with bad hair days in their life, even though not as annoyed as women. Even though men have short haircuts, they also face problems in maintaining their hair.
There are no formulae for success but there are some successful entrepreneur tips that can help make things a little simpler.
